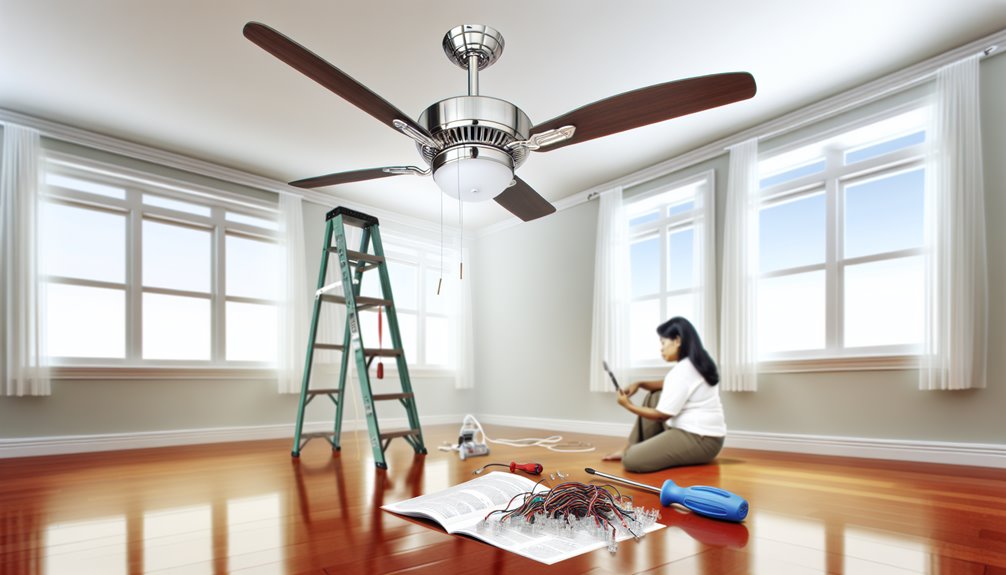
If you're considering installing a ceiling fan yourself, there are a few key points you should grasp before you start. You'll need the right tools, a solid understanding of electrical connections, and a firm commitment to safety. It's not just about hanging the fan; it's about ensuring it functions properly and lasts over time. Have you thought about the potential benefits and the mistakes you might avoid? Understanding these aspects can make a significant difference in your project's success. Let's explore what you need to know to get started effectively.
Key Takeaways
- Gather essential tools such as screwdrivers, pliers, and a voltage tester, and prepare a complete checklist for efficient installation.
- Ensure you understand electrical wiring by identifying wire colors: black (power), white (neutral), and green/bare (ground).
- Select the appropriate fan size and blade pitch for your room to optimize airflow and efficiency.
- Follow safety precautions, including turning off power at the breaker and using personal protective equipment during installation.
- Regularly maintain your ceiling fan by dusting blades, checking hardware, and ensuring it operates smoothly without excessive wobbling.
Benefits of Installing Ceiling Fans
When it comes to enhancing your home's comfort and style, installing ceiling fans is a smart choice that offers multiple benefits. First, they improve energy efficiency by reducing reliance on air conditioning during warmer months. You can also reverse the fan direction in winter, promoting better air circulation and maintaining warmth.
In addition to function, ceiling fans add aesthetic appeal to your space. With a variety of fan styles available, you can choose one that complements your decor. Many modern fans come equipped with remote controls, allowing you to adjust speed and lighting with ease.
When considering installation cost, you'll find that ceiling fans are generally affordable compared to other cooling options. It's also wise to look at brand comparisons and warranty options to guarantee you're investing in a quality product.
While most fans operate quietly, some may generate noise levels that could be bothersome, so read reviews before buying. By understanding these benefits, you can make an informed decision that enhances your home's comfort, decor, and energy efficiency while fitting your budget and lifestyle.
Tools and Materials Required
Before you start installing your ceiling fan, gather the essential tools and materials to guarantee a smooth process. Having a complete tools checklist will save you time and frustration. You'll need a screwdriver (both Phillips and flathead), a ladder to reach the ceiling, pliers, wire strippers, and a voltage tester to confirm safety. A drill can also be useful for mounting the fan securely.
Next, consider the material types you'll need for installation. Most ceiling fans come with mounting brackets, but you might need additional hardware, such as screws and anchors, depending on your ceiling type. If your fan requires a light kit, make sure you have the necessary bulbs and wiring ready. Don't forget electrical tape for securing wire connections.
Lastly, if your ceiling fan operates with a remote or wall switch, confirm you have the appropriate batteries or wiring available. By preparing this tools checklist and gathering all required material types in advance, you'll set yourself up for a successful installation without unnecessary interruptions. Happy installing!
Choosing the Right Ceiling Fan
Choosing the right ceiling fan can transform the comfort and aesthetics of your space. Start by considering the fan size; it should match the dimensions of your room for best airflow. For style options, you'll find everything from modern to rustic designs, so pick one that complements your decor.
Look for energy efficiency ratings to save on electricity bills. Brush up on motor types—DC motors are quieter and more efficient compared to traditional AC motors. Blade materials also play a role; wood and plastic have different impacts on style and performance.
Additionally, pay attention to noise levels, especially if you plan to install the fan in a bedroom or study. Don't forget about the installation height; ideally, the fan should be 7-9 feet above the floor for peak efficiency.
When shopping, compare brands to find one that offers good warranty coverage. Some fans even come with a remote control for added convenience. By considering these factors, you'll find a ceiling fan that not only enhances your space but also meets your practical needs.
Understanding Electrical Connections
After selecting the perfect ceiling fan, it's important to understand the electrical connections needed for installation. First, make certain you've got the right tools and materials, including wire connectors and a voltage tester. You'll typically encounter three wires when connecting your ceiling fan: black (or red), white, and green (or bare copper).
Wire color coding is vital for guaranteeing a successful setup. The black wire is usually for the fan's power, the white wire is the neutral, and the green or bare wire is for grounding. When connecting these wires, follow the color code: connect the black wire from the ceiling to the black wire from the fan, the white wire to the white wire, and finally, the green or bare wire to the grounding point in your electrical box.
Utilizing proper grounding techniques is essential for safety. Confirm all connections are secure and that the grounding wire is firmly attached to prevent any electrical hazards. Double-check your connections before turning the power back on, and you'll be set to enjoy your new ceiling fan in no time!
Safety Precautions to Follow
While you're excited to install your new ceiling fan, it's crucial to prioritize safety throughout the process. Start by wearing the right personal protective equipment. Safety goggles can shield your eyes from dust and debris, while gloves protect your hands from sharp edges or electrical components.
Before you begin, verify your workspace is well-lit and free from clutter. This will help you focus on the task and avoid accidents. When it comes to electrical safety, always turn off the power to the circuit you'll be working on at the breaker box. Use a voltage tester to confirm the power is off before touching any wires.
Keep in mind that working with electricity carries inherent risks. If you're unsure about your abilities or the wiring in your home, don't hesitate to consult a professional electrician. It's better to be safe than sorry.
Lastly, make certain your ladder is stable and positioned correctly. Avoid overreaching or leaning too far, as this can lead to falls. By following these safety precautions, you can create a secure environment for your ceiling fan installation.
Preparing the Installation Area
Once you've verified your workspace is safe, it's time to prepare the installation area for your ceiling fan. Start by evaluating the ceiling height considerations. Ideally, your fan should hang about 8 to 9 feet above the floor for peak airflow and comfort. If you have low ceilings, consider a flush-mount fan to maintain adequate clearance.
Next, think about the room size impact. A larger room may require a fan with a bigger blade span to move enough air effectively. Measure your room's dimensions, and then select a fan that fits both the space and your aesthetic preferences. Additionally, confirm there's enough room for the fan to rotate freely without any obstructions, like light fixtures or beams.
Clear the area beneath the installation site, moving any furniture or decor that might get in the way. This not only makes your job easier but also helps prevent any accidental damage. Finally, double-check that you have all the necessary tools and equipment handy. With these preparations in place, you'll be set to tackle the installation with confidence.
Removing the Old Fixture
Removing the old fixture is an essential step before installing your new ceiling fan. Start by turning off the power at the circuit breaker to guarantee your safety during the old fixture removal process. Once the power is off, carefully remove any light bulbs and shades from the existing fixture.
Next, you'll need to unscrew the mounting bracket that holds the fixture in place. Depending on the fixture, you might have to remove screws or nuts that secure it to the ceiling. As you do this, support the fixture with one hand to prevent it from falling.
Once it's loose, gently pull the fixture down and disconnect the wiring. Take note of how the wires are connected—this will help during your ceiling fan replacement. Typically, you'll find black (live), white (neutral), and green or copper (ground) wires. Disconnect them by twisting off the wire nuts, but be sure to keep the wire connections in order for easy reattachment.
Mounting the Ceiling Fan Brace
To guarantee your ceiling fan is securely installed, you'll need to mount a ceiling fan brace, which provides the necessary support. There are several fan brace types available, including ceiling fan mounting brackets and expandable braces. Choose one that fits your ceiling type and the weight of your fan.
Before you start, gather your tools: a drill, screwdriver, and level. First, locate the ceiling joists, as they'll be your anchor points. If you're using an expandable brace, insert it between the joists and tighten it according to the manufacturer's instructions. If you opt for a mounting bracket, secure it directly to the joist, making sure it's straight with the level.
Installation tips include double-checking for stability; give the brace a firm tug to verify it's secure. You want to avoid any wobbling once the fan is in place. Finally, make sure the brace has enough clearance for the fan blades. Following these steps will guarantee your ceiling fan is safely mounted and ready for the next phase of installation. Remember, a solid brace means a safe, efficient fan!
Wiring the Ceiling Fan
With your ceiling fan brace securely in place, the next step is wiring the ceiling fan. Begin by turning off the power at the circuit breaker to guarantee safety while working on the fan wiring. Once you've confirmed the power is off, you'll see the wires hanging from your ceiling. Typically, you'll find black, white, and green (or bare) wires.
Connect the black wire from the ceiling to the black wire on the fan. This wire controls the fan's power. Next, connect the white wire from the ceiling to the white wire on the fan; this is your neutral connection. Finally, attach the green or bare wire to the green wire on the fan, which is essential for grounding. Make sure all connections are secure and use wire nuts to cover them properly.
Always follow local electrical codes to guarantee your installation is safe and compliant. If you're uncertain about any part of the fan wiring process, don't hesitate to consult a professional electrician. Once everything is wired correctly, you can move on to the next steps in your ceiling fan installation.
Attaching the Fan Blades
After guaranteeing your fan is securely wired and ready for operation, it's time to attach the fan blades. Start by selecting the right fan blade types for your ceiling fan. Most fans come with specific blades designed to maximize air movement and efficiency. Check the manufacturer's instructions for compatibility.
Next, consider the blade pitch, which is the angle of the blades. A higher pitch (between 12 to 15 degrees) typically moves more air and is better for larger rooms, while a lower pitch (around 8 to 10 degrees) is suitable for smaller spaces.
Now, gather your tools—usually a screwdriver and the screws that came with your fan. Align each blade with the mounting brackets on the fan motor. Secure them tightly, but be cautious not to overtighten, as this can damage the blades.
Once all blades are attached, step back and give them a gentle spin to verify they're balanced and secure. This step is essential for the fan's performance. With the blades in place, you're one step closer to enjoying a cooler, more comfortable home!
Installing the Light Kit
Once you've securely attached the fan blades, it's time to install the light kit. First, gather your tools and read through the instructions that came with your specific light kit type. Light kits vary, so understanding the components you'll be working with is essential.
Start by locating the wiring harness on the ceiling fan. Most light kits will have a connector that fits this harness. If your fan doesn't have one pre-installed, you'll need to connect the wires manually. Match the colors: black to black, white to white, and green or bare to the ground wire.
Once the wiring is secure, align the light kit with the mounting bracket on the fan. Use the installation techniques outlined in your manual to attach it, ensuring it's snug and stable. Be careful not to overtighten, as this can damage the components.
Testing the Fan Functionality
How can you guarantee your ceiling fan is functioning properly after installation? Start by turning on the power at the circuit breaker and switching on the fan. Use the remote control to test different fan speed settings—low, medium, and high. Make certain the fan responds accordingly; if it doesn't, you may need to check your connections.
Next, listen for any unusual noises. A properly installed fan should operate quietly. If you hear grinding or rattling, it might indicate loose components or improper installation. To further ascertain functionality, check the fan's direction. Most fans have a switch to reverse the airflow; test this to see if it changes the breeze direction as expected.
Lastly, observe the fan's wobbling. A slight wobble is normal, but excessive movement may signal a need for adjustment. Tighten any loose screws or verify the blades are evenly spaced. After testing all these aspects, you'll have confidence that your ceiling fan is ready for use, providing comfort and style in your space.
Maintenance Tips for Longevity
To keep your ceiling fan running smoothly and extend its lifespan, regular maintenance is key. Start by dusting your fan blades with a microfiber cloth or a soft brush. This simple cleaning technique prevents dust buildup, which can hinder performance and create noise. Aim to clean your fan at least once a month, especially if you live in a dusty environment.
Next, check the mounting hardware. Make sure all screws and brackets are tight to avoid wobbling. If you notice any unusual sounds, it might be time to inspect the motor.
Lubrication methods are also essential for a quiet, efficient fan. Depending on your fan model, you might need to apply a few drops of lightweight machine oil to the motor shaft. This helps reduce friction and wear over time.
Lastly, replace any burnt-out bulbs promptly to guarantee ideal lighting and energy efficiency. By following these maintenance tips, you'll not only enhance your ceiling fan's performance but also prolong its life, making your investment worthwhile. Regular care means a cooler, quieter home for years to come!
Troubleshooting Common Issues
When your ceiling fan starts acting up, it's important to track down the issue quickly to restore comfort to your space. One common problem is excessive fan noise. If your fan is making an unusual sound, check for loose screws or components. Tightening these can often resolve the issue.
Another frequent culprit is blade balance. If your fan wobbles or shakes, it can cause noise and reduce efficiency. To fix this, you can use a blade balancing kit, which usually includes weights that you can attach to the blades. Start by identifying the heaviest blade and add weight to the opposite blade until you achieve balance.
Also, make sure that your fan is installed securely. A loose mounting bracket can cause both noise and movement. If you've checked these issues and your fan still isn't performing well, consider consulting the manufacturer's manual or reaching out to a professional electrician. Remember, troubleshooting your ceiling fan doesn't have to be intimidating; with a little patience and some simple checks, you can often resolve the issues yourself.
Conclusion
By installing a ceiling fan yourself, you not only save money but also boost your home's energy efficiency—ceiling fans can reduce air conditioning costs by up to 40%. Remember to follow safety precautions, verify proper electrical connections, and maintain your fan for peak performance. With the right tools and knowledge, you'll enjoy cool breezes and added comfort in no time. So why wait? Immerse yourself in your DIY project and take control of your home's climate!


Leave a Reply